| ||||
| ||||
| Moderated by: Greg Fletcher | Page: 1 2   |
|
|||||||||||||
| Project 16984. | Rate Topic |
| Author | Post |
|---|
| Posted: 10-03-2016 05:53 pm |
|
1st Post |
|
SlamminJH Member
|
Hello all! After lusting after English roadsters I finally got myself into one. I never really wanted a MGB or TR6 because EVERYONE has at least two of those cars, each. Then I found myself tagged in a post with a Craigslist ad for #16984. This car had been on here before with the previous owner. I picked it up 10/1/2016 and began digging in. First of all I'm going to focus on getting the engine running, then body/rust repairs. Other things such as brakes, suspension bits will be tossed in there willy nilly as I wait on parts/etc. Now, for the first of a series of questions: Rust. The previous owner had the floor pans replaced some time ago. They still appear fine. However there are three major places with rust. The first being under the brake booster in the back of the inner wing. Appears brake fluid may have eaten paint off and then the accumulation of bio-trash held moisture, and then it rusted through. Vacuuming the bio-trash out revealed this weak point. No biggie to fix that for me. I'm pretty good with a plasma cutter and welder. The second place, and probably the easier fix, the boot floor under the fuel tank is pretty holey. Figure some cutting and plate steel will make that whole again. The fuel tank itself I don't think has much of a chance of being salvaged. One of the parts that worries me is under the left (driver's) side hood hinge. Appears it's more of a molded piece that I'd rather find from another car to cut and weld into place. The right (passenger) side isn't as bad, but could use some minor patching. The last bit I think I'm mostly worried with is under the windscreen. The glass itself is shattered and needs replaced, but I can see bubbling coming from under the chrome trim. I'll pull the shattered glass, etc and get a better look, but methinks it's going to be the biggest challenge. Any resources for any of the above bits would be greatly appreciated. Like I said, I'm pretty good with a welder, etc....but anything to make my life, and bringing this car back, easier is welcome. -Jeff H.
|
||||||||||||||
| |||||||||||||||
| Posted: 10-05-2016 04:53 pm |
|
2nd Post |
|
SlamminJH Member
|
So, I've torn down the car to try and discover all of the rust issues. Here's the worst of it: Under the brake booster 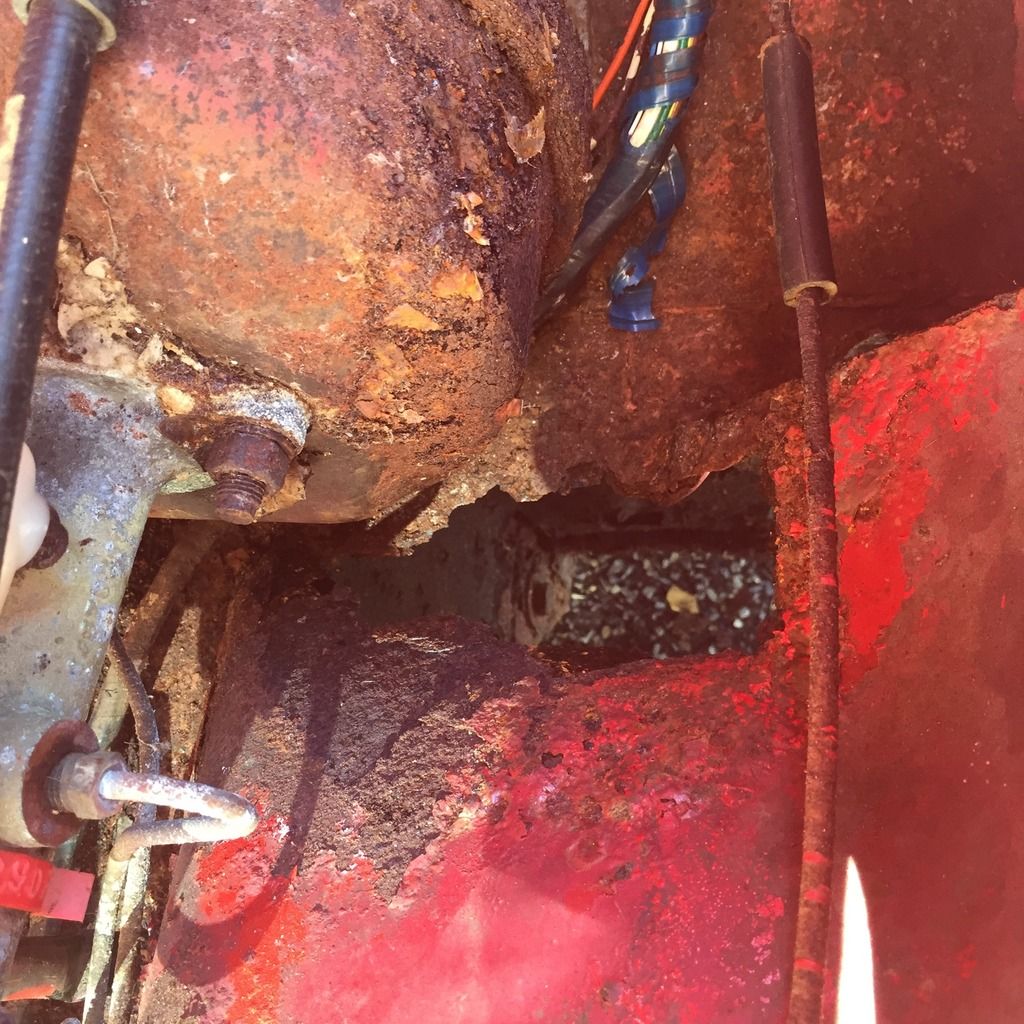 Under the left hood hinge 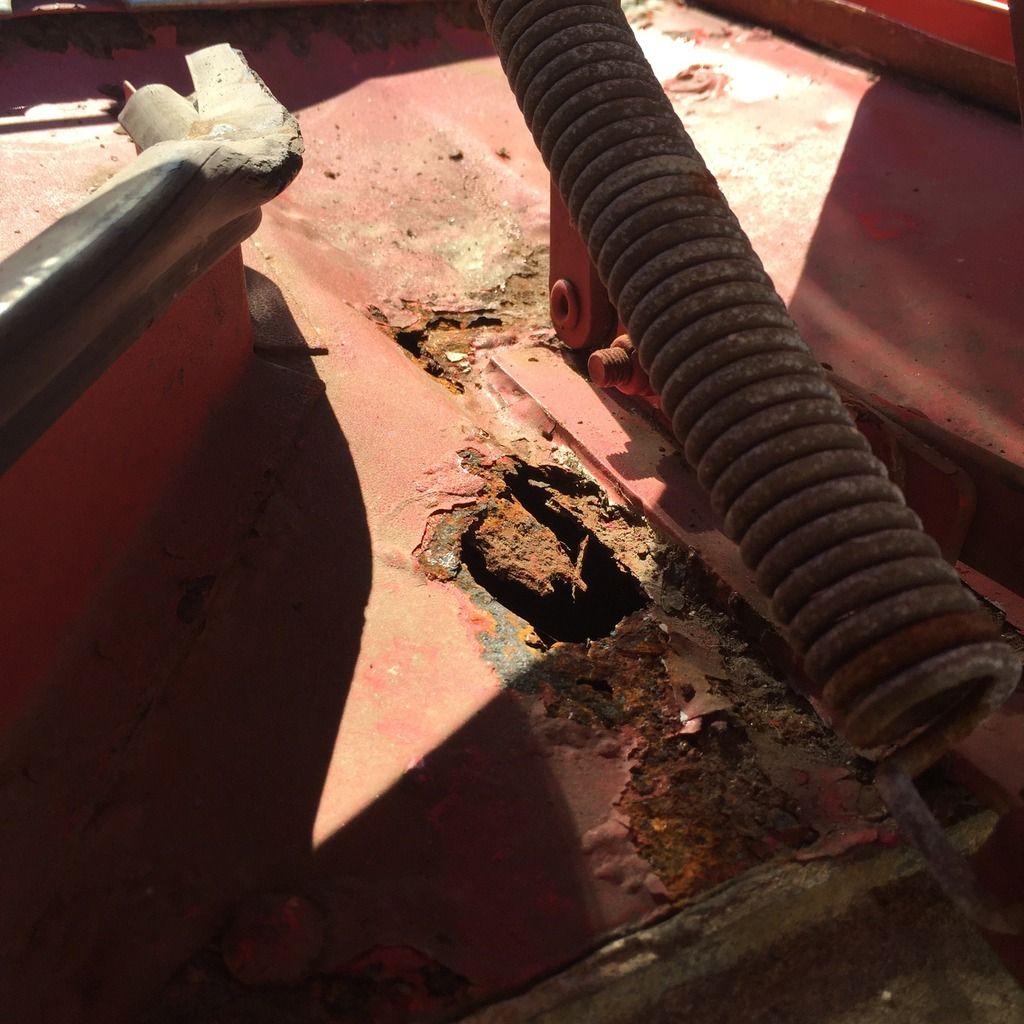 Under the fuel tank 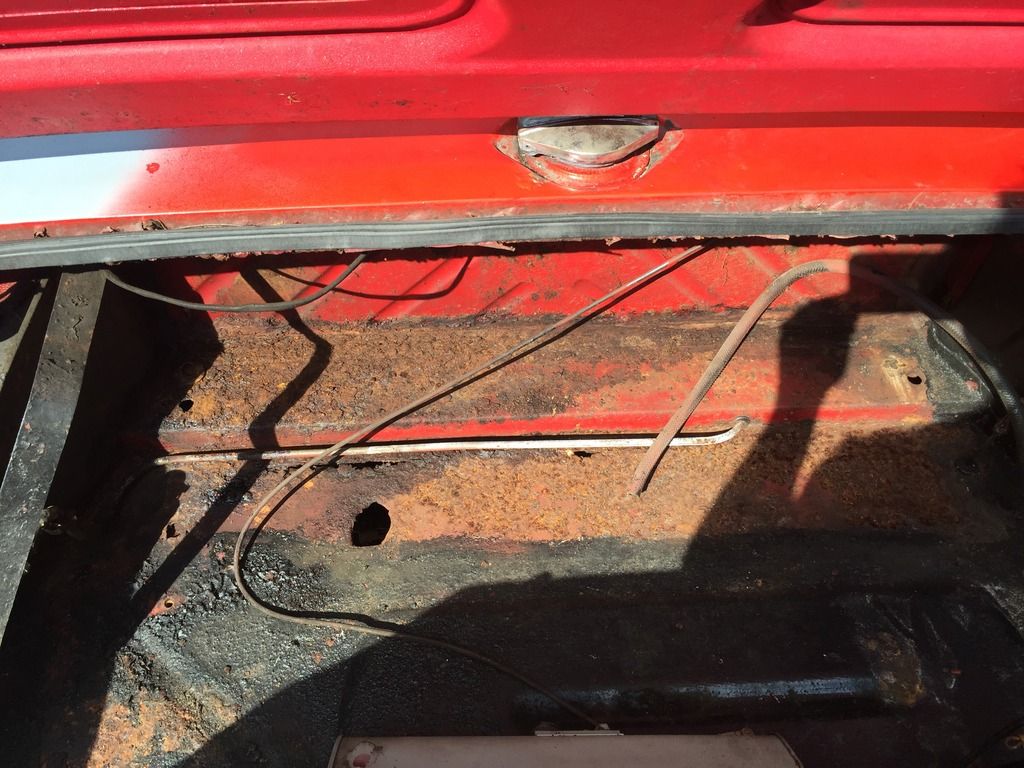 Under the windscreen/trim 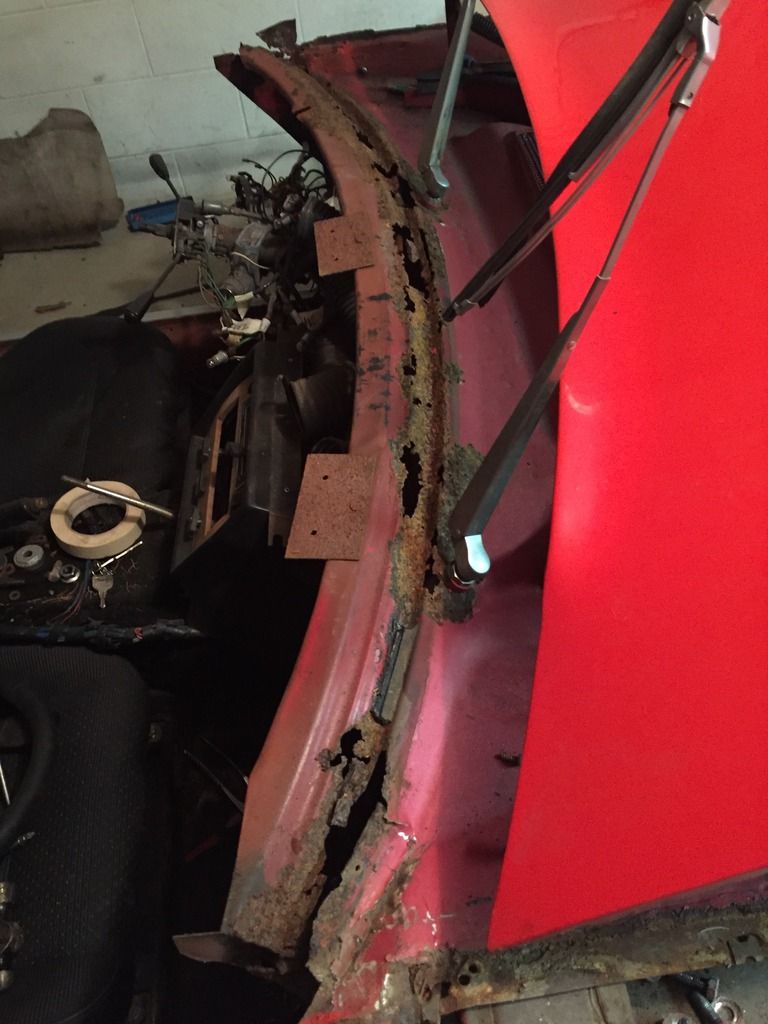 There's other rust, but it's all easy stuff. The floor pans still look good. I'm thinking the windscreen bit will be the more challenging repair. I may end up forming the replacement out of three or four smaller sections...made with a metal brake, stretcher, and possibly try my hand with an English wheel. The other stuff seems simple enough to cut and weld. I will most likely need a new fuel tank...I don't think this one is salvageable. Last edited on 10-05-2016 10:23 pm by SlamminJH |
|||||||||||||
| ||||||||||||||
| Posted: 10-07-2016 08:11 am |
|
3rd Post |
|
Tim Murphy Member
|
Man, I got to say this even though it doesn't feel good to do so. That may be too much rust and age damage, plus the engine doesn't run. The car is not a good candidate for repair or restoration. I hope others with more knowledge and experience than I will post here, either to agree or disagree with me. I hate to see someone spend thousands of dollars and thousands of hours work on something that will not work out. Check the ads here in the marketplace section to see if anything is available near you. Take care all.
|
||||||||||||||
| |||||||||||||||
| Posted: 10-07-2016 06:12 pm |
|
4th Post |
|
answerman Member
|
If you're that good of a metal worker, all the power in the world to you. I made my own floor pans last winter and that was complicated enough. I'm somewhere in between the other guys here. This looks like a LOT of work. I agree with Tim that most people here would probably not take this project on. Having said that, anything is doable with the right tools and skills. If it was me, and assuming that the rest of the car is structurally solid (my biggest concern would be the rockers/sills) I think I'd be looking for another car to cut these sections out of for grafting onto your car. Especially that area under the windshield. The problem is that with the monocoque construction, these parts are all part of the structural integrity of the car and just patching them up isn't as easy or effective as it might be on another car. Hindsight being 20/20, it's too bad you didn't take this on 3 years earlier as I had a parts car that would have been perfect for you (pretty much rust free but the front end had been crunched pretty well). I took everything I could off of it and sent it to the crusher. It never occurred to me that anyone would try to replace the parts you're looking at.
|
|||||||||||||
| ||||||||||||||
| Posted: 10-08-2016 02:05 am |
|
5th Post |
|
Sander Member
|
Let me save you a little work. Don't fill in the hole pictured in the trunk. It's where the gas tank drainplug goes. The rest of the holes, my Jensen brother, are all yours! May the torch be with you ....
|
||||||||||||||
| |||||||||||||||
| Posted: 10-10-2016 03:55 am |
|
6th Post |
|
Art DeKneef Member
|
You certainly have your work cutout if you decide to fix all that rust. Like others have mentioned you should hope for a donor car somewhere to get the pieces if possible. Having said that, nothing is impossible. It just takes longer and costs more. From what I can see you're correct that the trunk area will be the easier fix of the group. Next would probably be the area by the brake booster. Until you have the booster off it's hard to determine the extent of the damage. What does it look like under that area? Might be hard to see in the wheel well area because of the undercoating tar. But look at the inside under the dash and see what it looks like. I'm guessing the area is bigger than it looks. You're going to need to replace part of the firewall there. Next up would be the hood hinge areas. You mention the passenger side could use some "minor patching" also. Based on that you may end up needing to do both sides. The piece itself isn't hard to make. It's relatively easy. It's what underneath that also poses an issue. There are a lot of spot welds that need to be undone. I'll bet that if you cut out part of this area you will find some of the structure will need to be replaced. Finally there is the windshield base area. This will be the most difficult piece to make. Do you have access to a bead roller? It would certainly help. What kind of welder do you have. Sounds like it is a TIG because you have a plasma cutter. That whole area is a concern because those three areas are tied together. You need to remove all the items in the way. That means hood, brake parts, wiring harness, wiper motor, etc. Then sand or media blast to find all the spot welds to get an accurate look at the surrounding metal. It certainly will be an interesting job and learning experience.
|
|||||||||||||
| ||||||||||||||
| Posted: 10-10-2016 10:12 pm |
|
7th Post |
|
SlamminJH Member
|
Thanks for the insight guys! As it turns out a gentleman has reached out to me with a shell that has the bits I need in tact. I'm planning to take a mighty trip to go pick it up in the coming weeks. The passenger side hood hinge is all "surface" rust. After removing the hood I was able to verify there are no thru holes there. Just some paint bubbling which I could scrape away. Between now and the time I can get away to pickup the shell I'll be working on getting the thing running. Timing belt, oil service, plugs, etc. Figure if it does come down to parting it, a running engine would be easier to sell than something I have no idea on. But lets not get to far ahead of ourselves. I personally think it's worth it to fix it, but I'm a known masochist in the BMW world....I put a v12 w/6sp in my 1994 525i touring....
|
||||||||||||||
| |||||||||||||||
| Posted: 11-02-2016 02:41 pm |
|
8th Post |
|
SlamminJH Member
|
Rebuilt the carbs, put them on and started it. This is after a couple tries, but I consider it the first official start. https://www.youtube.com/watch?v=uH26jn1TKcE Then to see if it moved. It does. No brakes though. https://www.youtube.com/watch?v=uQLQ-LHqko0 Last edited on 11-02-2016 02:42 pm by SlamminJH |
|||||||||||||
| ||||||||||||||
| Posted: 11-04-2016 04:29 pm |
|
9th Post |
|
Bfitz241 Member
|
Good luck with the resto. Just curious, do you MIG or TIG bodywork sheetmetal? I've been using MIG but have heard TIG can be used and would appreciate your input.
|
||||||||||||||
| |||||||||||||||
| Posted: 11-04-2016 06:42 pm |
|
10th Post |
|
SlamminJH Member
|
I prefer TIG as it's very clean and looks good....but it takes a long time. MIG for body work is what I've done in the past. Quicker, and really, most of the welding will be covered up. Others opinion/methods may differ. I'm no pro-body guy. I just dabble in it. I prefer to get rust free cars with mechanical issues....but I didn't follow that rule here.
|
|||||||||||||
| ||||||||||||||
| Posted: 11-06-2016 02:56 am |
|
11th Post |
|
Bfitz241 Member
|
I agree. You can't always get solid metal, just do the best with what you find. I use MIG too....023 wire for sheetmetal. Comes in handy.
|
||||||||||||||
| |||||||||||||||
| Posted: 01-27-2017 02:45 pm |
|
12th Post |
|
SlamminJH Member
|
So I just bought #19998 in California. It's a 12/30/1974 car. Working out details to have it shipped to Va. Non-runner, has sat for ~10 years I hear due to burnt valves. Figure I can swap my current engine in from the rusty car and rebuild 19998's engine by and by.
|
|||||||||||||
| ||||||||||||||
| Posted: 05-30-2017 04:22 pm |
|
13th Post |
|
SlamminJH Member
|
Alright, so I finally got the replacement car. #16984 will become a parts car. The rust is simply too much. I'll most likely cut out the good floors and rockers and harvest whatever else I can from it for spares. Introducing #19998. (Any way to change the thread title to "Project 19998"?) This is it at the shop in San Anselmo, CA getting picked up. 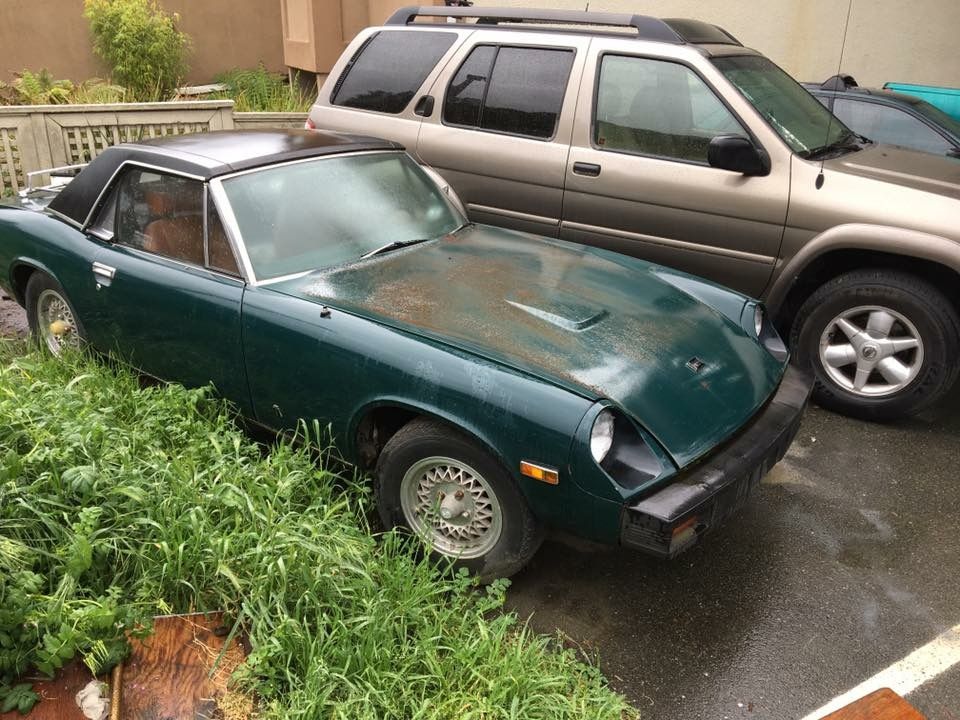 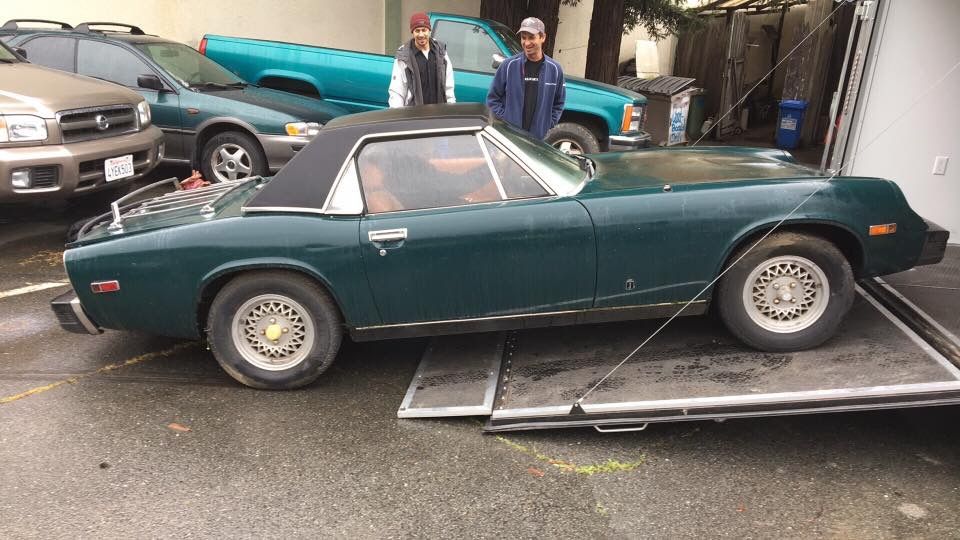 The brakes were obviously locked up, so it was drug onto the enclosed trailer for the trip East. A friend of mine picked up and delivered it, so it took about 2 months to get it home, but it was cheap and I knew it was in good hands. I did't even get to see the car until 4 months after buying it. Didn't know it had a roll bar until my friend took a pic of him using the luggage rack to "transport" some springs to The Vintage (BMW meet) in Asheville, where I was taking delivery of the car. Here it is after finally getting it "home". "Home" being my parent's place as I don't have a garage at my house, yet. 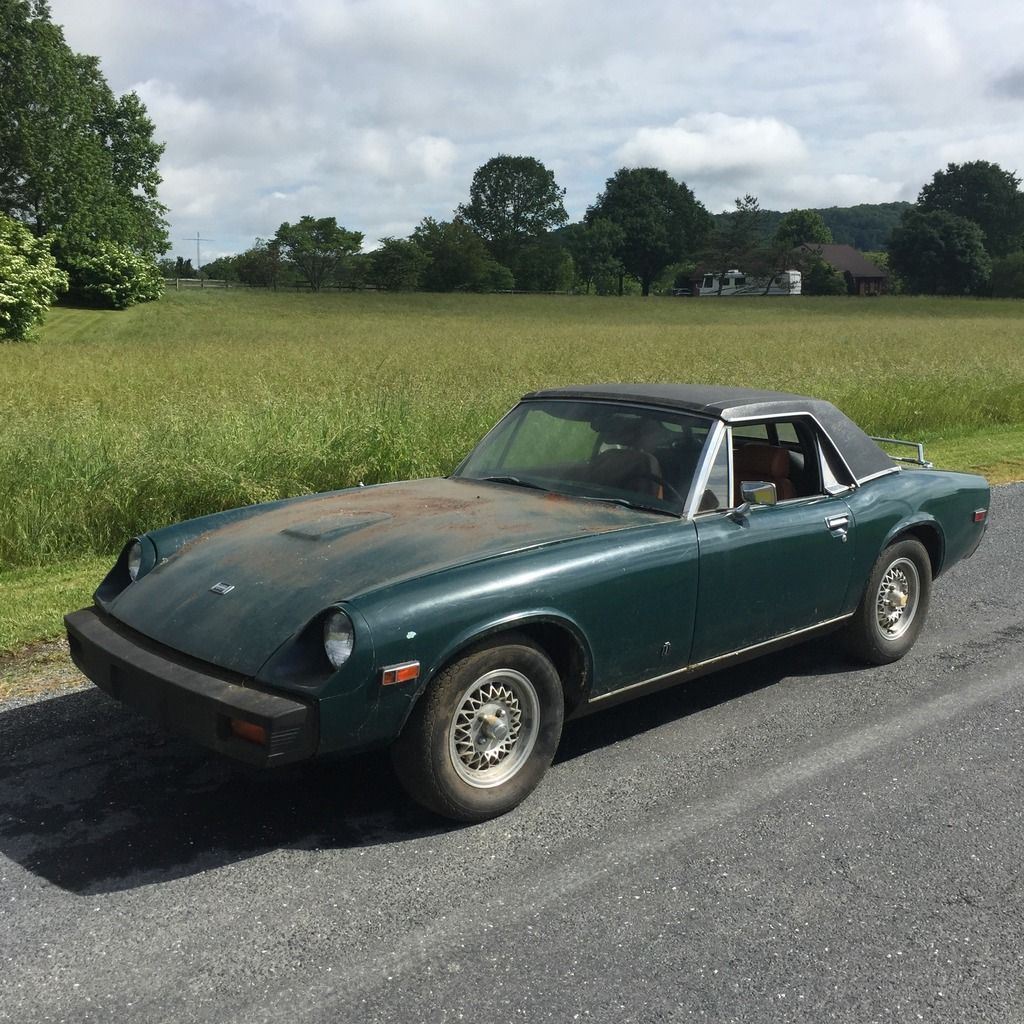  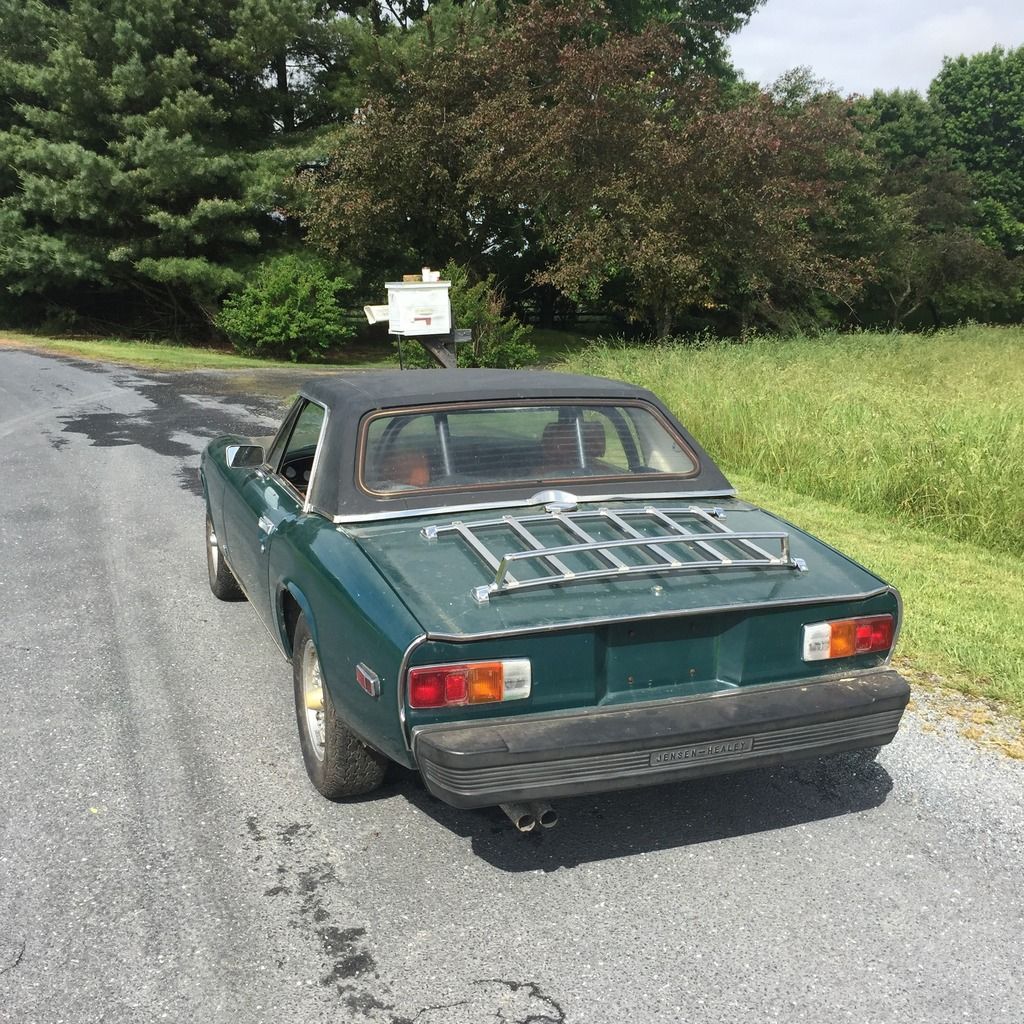 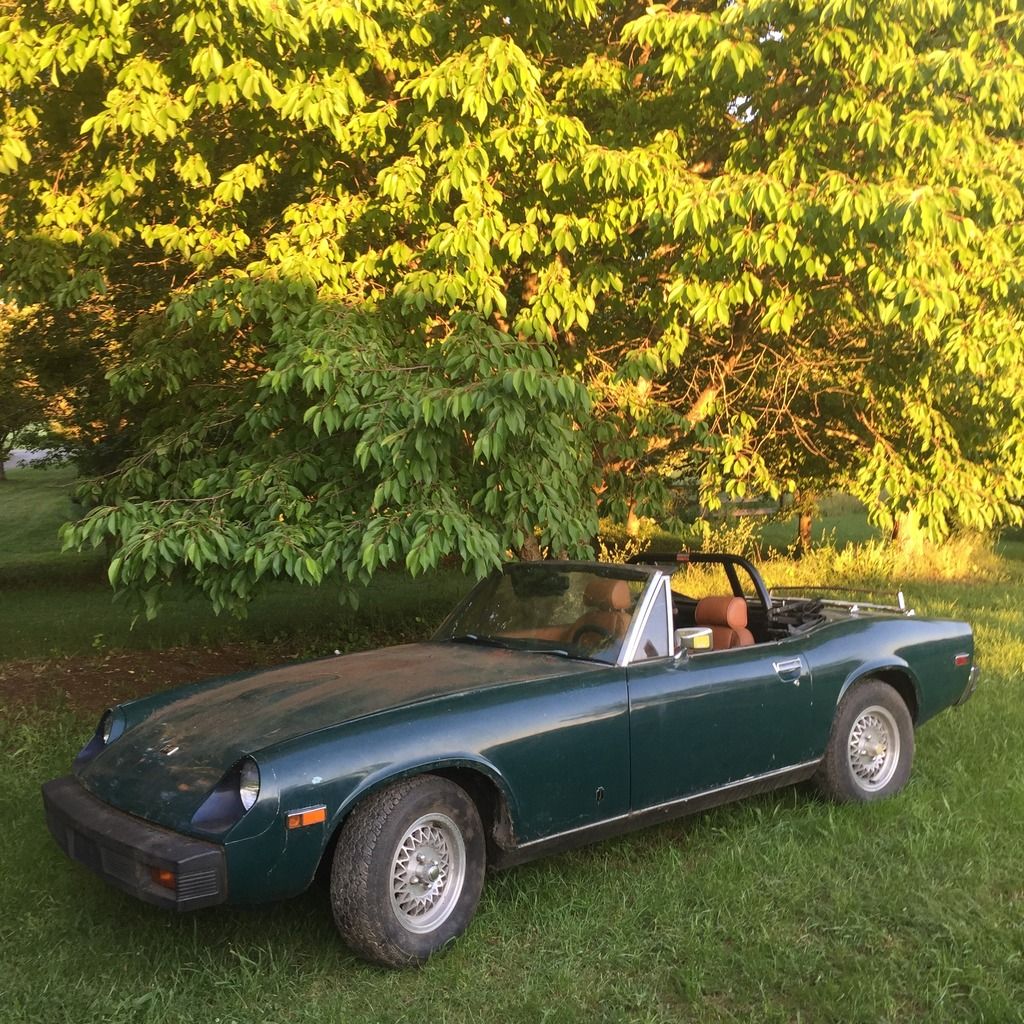 Popped it up on the lift to assess the floor/underneath of the car. The floors aren't bad. Driver's side has a couple spots where someone tried to repair them with some goo and patch panels. The passenger side has some more significant rust, but it's manageable. 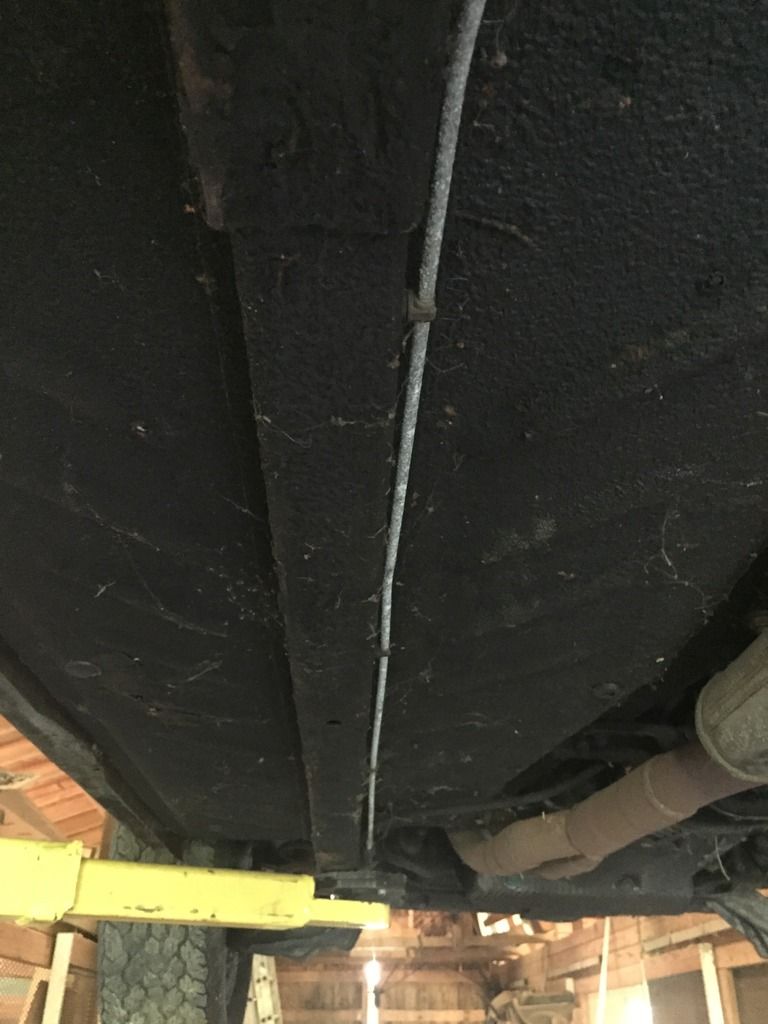 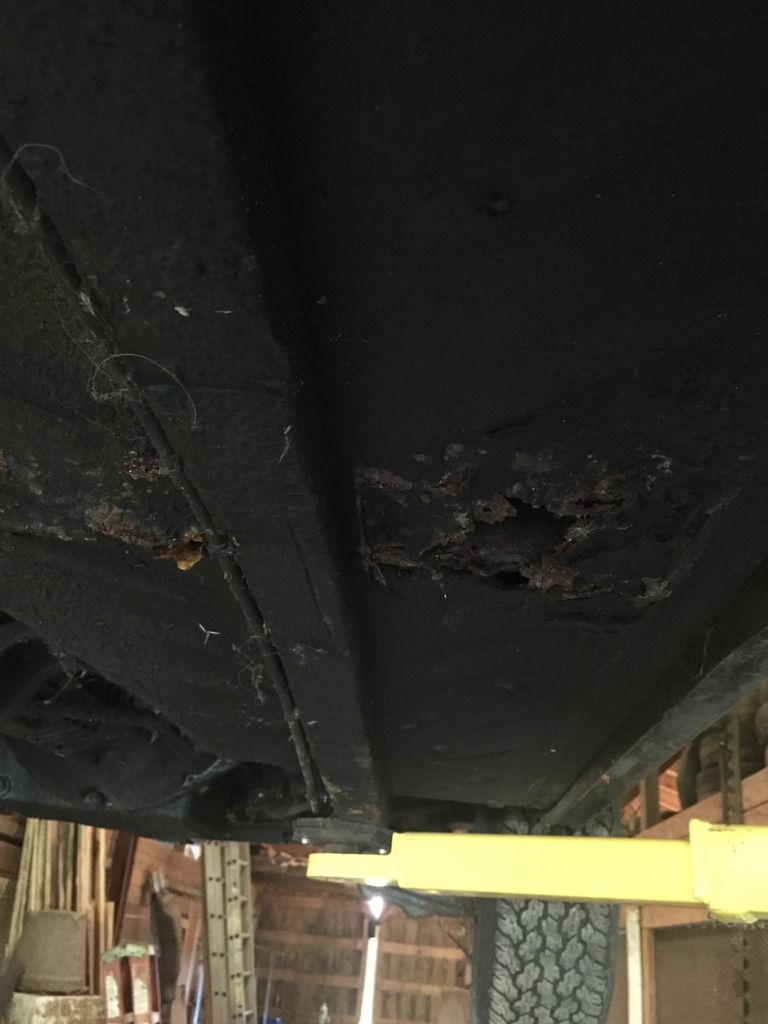 Rockers are rock solid, as well as the rest of the car. On small small spot on the front, left fender....but nothing that's not repairable. The inside of the fuel tank is spotless, totally clean. I pulled it and cleaned out the trunk. Some road flares had deteriorated and made a huge mess. The carpet is garbage. Most of whats in the pic is from the carpet, not rust. There is a little surface, but no holes. Under the tank someone had already put some vacuum hose to space it up. I'll be cleaning and painting the trunk and the tank. 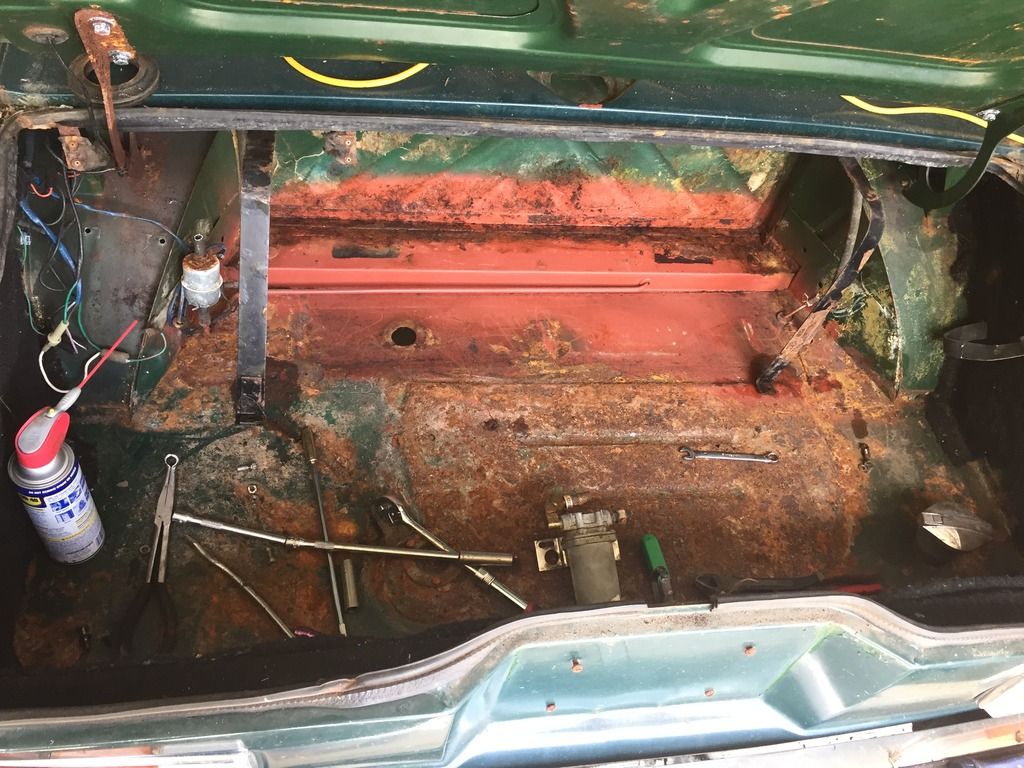 The engine was covered in a rodent nest that apparently liked to dine on snails. Snail shells were ALL OVER the place. It had the original timing covers, but I left those off when I did the belt. They're brittle, didn't want to break them. Did the timing belt and tensioner, cleaned it all up, oil change and filter. Carbs are free and clean. I think someone drained all the fuel as there wasn't any smell, residue, or liquid when I took off the lines, etc. With a good battery she fired right up with a bottle of fuel between the carbs. 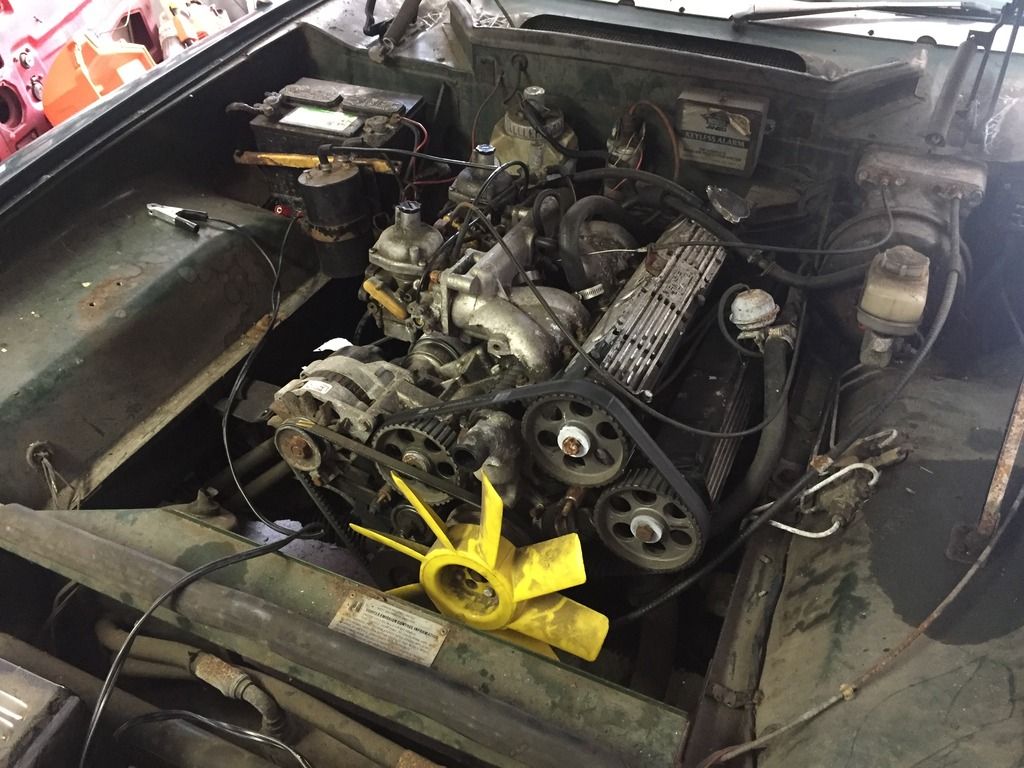 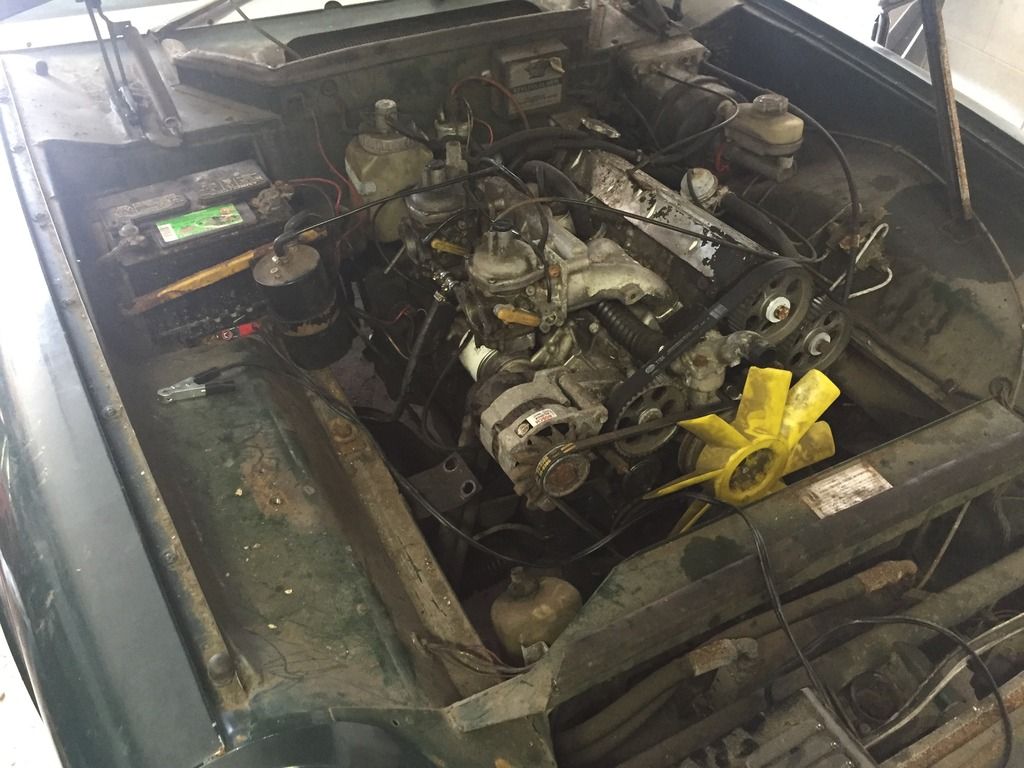 Next up....interior.... Last edited on 05-30-2017 04:36 pm by SlamminJH |
||||||||||||||
| |||||||||||||||
| Posted: 05-30-2017 04:34 pm |
|
14th Post |
|
SlamminJH Member
|
Interior: It's amazing. Of course the floors need some work, so ignore those. The rest of the interior is all there and all in amazing shape. Pic are after a good steam cleaning. Ordered some Leatherique to go over everything and get the leather back, but it's still fairly supple and soft. 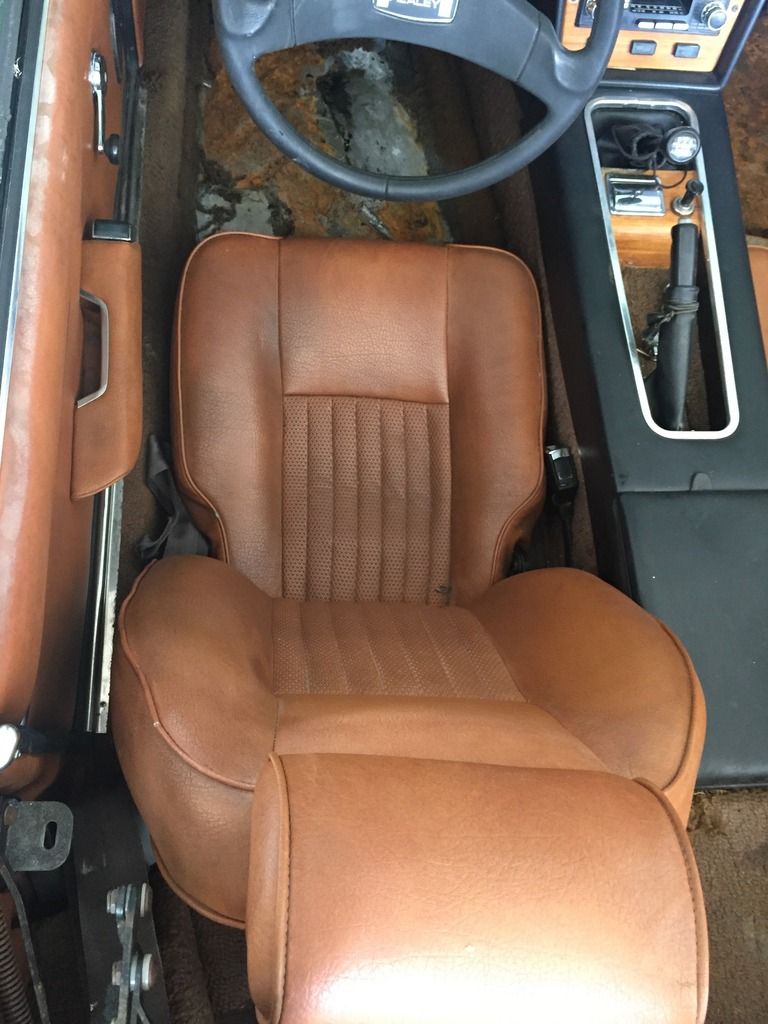 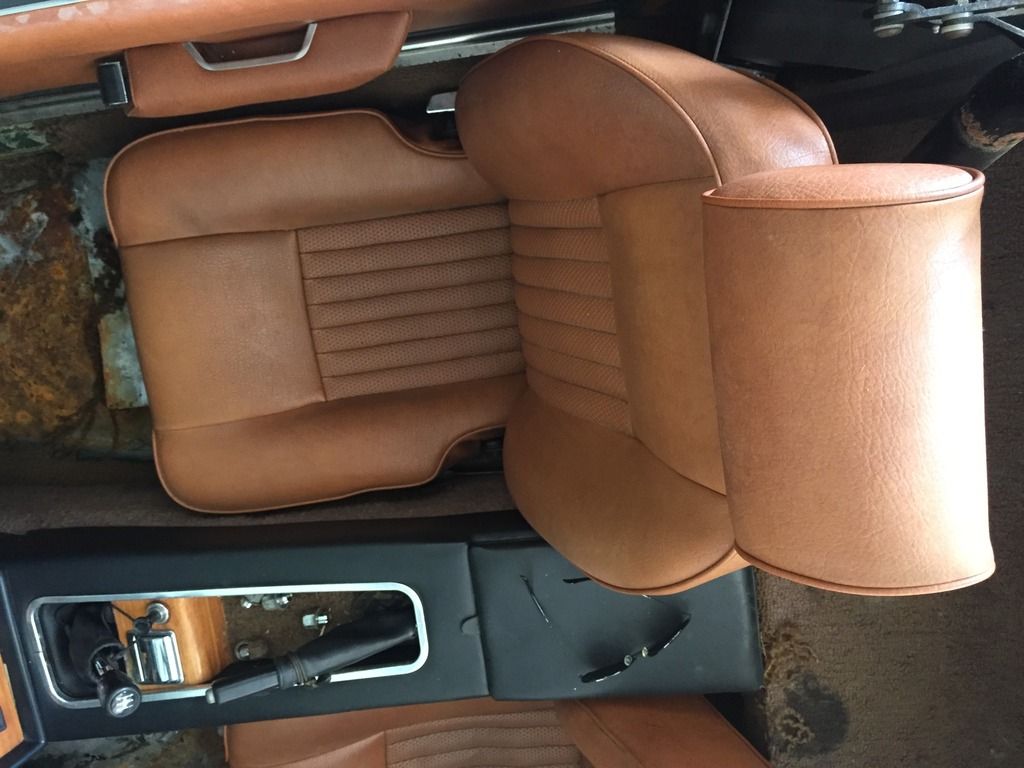 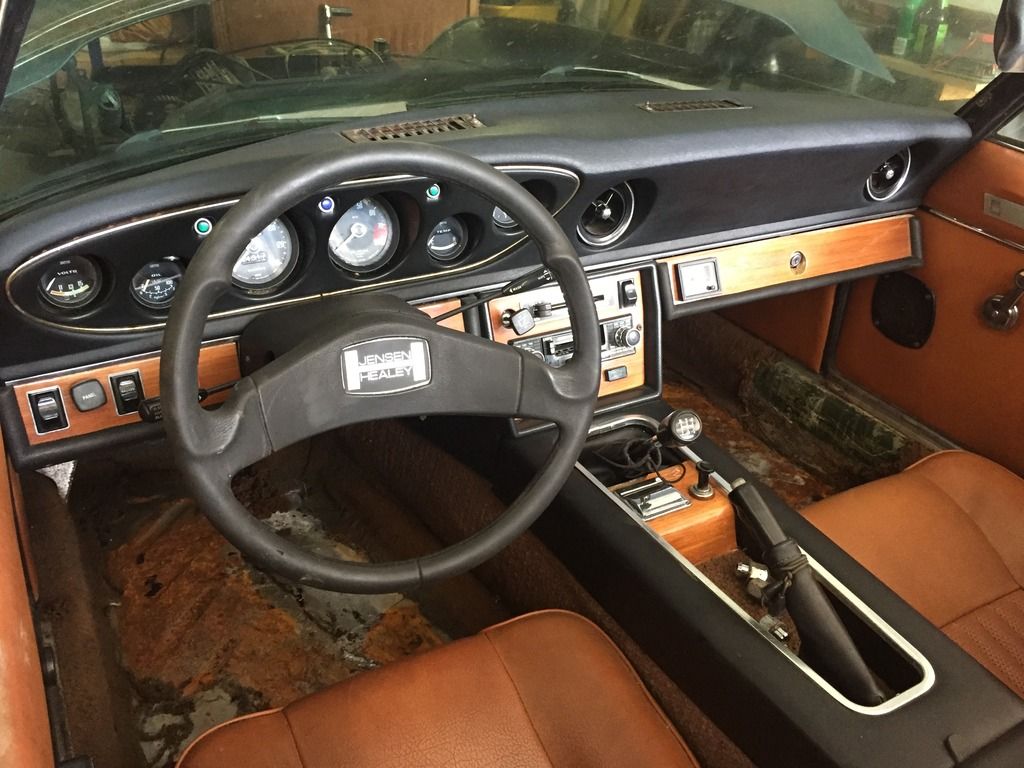 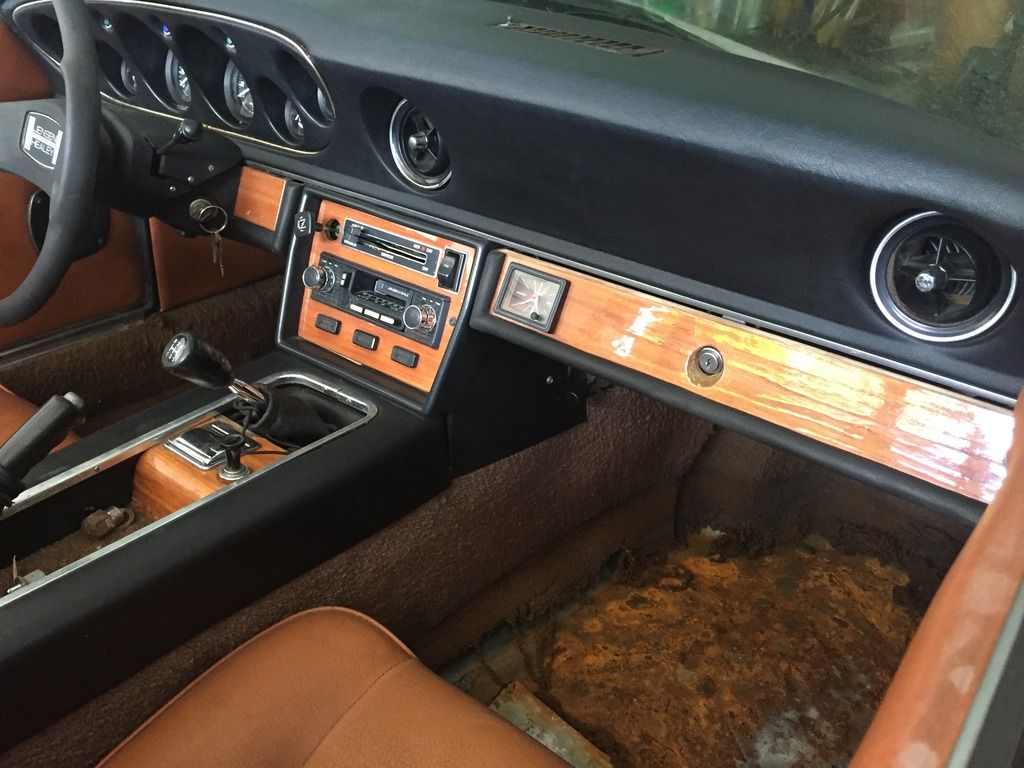 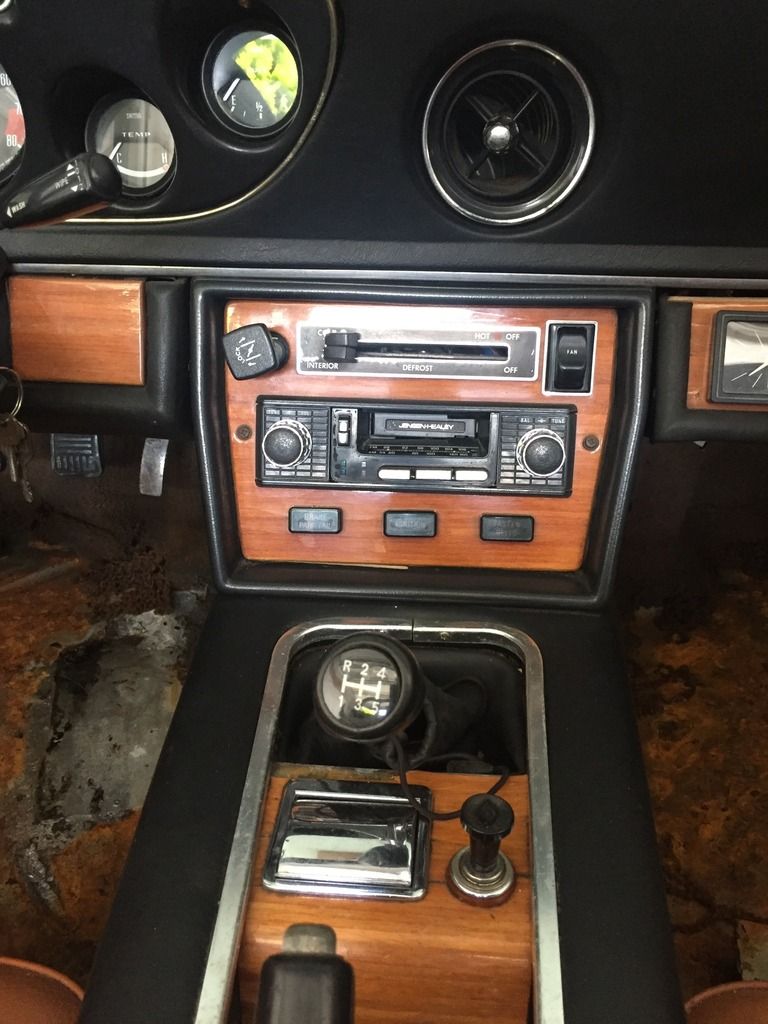 Soft top is perfect aside from the window being a bit discolored. PO had it folded up with towels in between the folds. No rips, tears, or cracks. 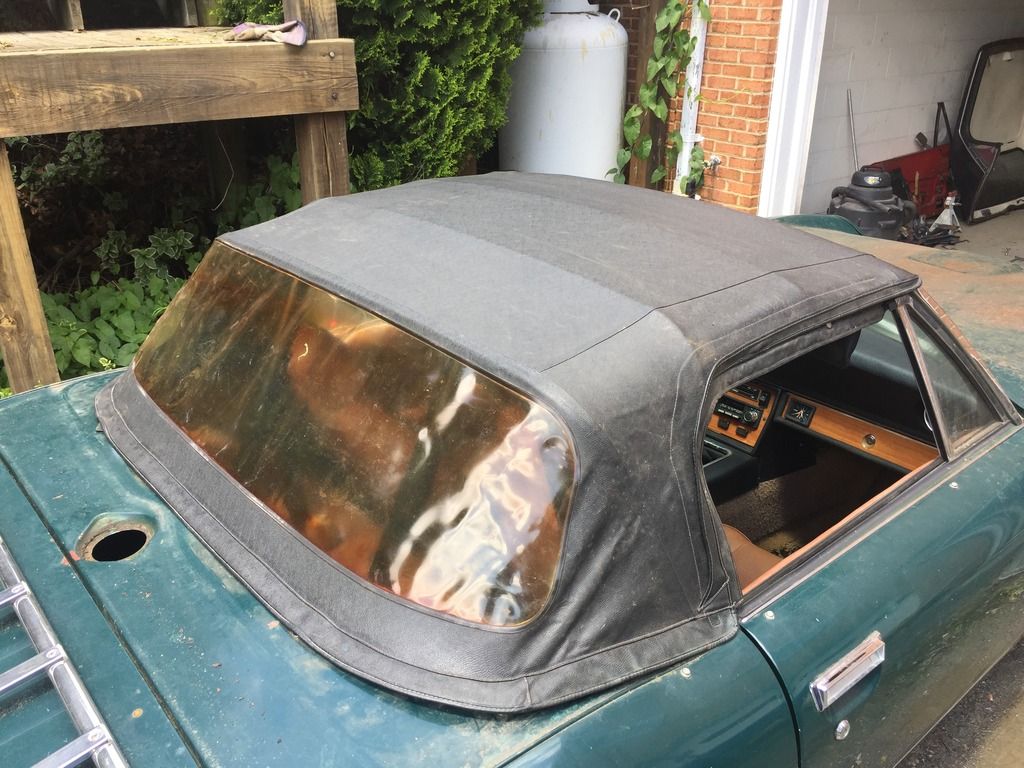 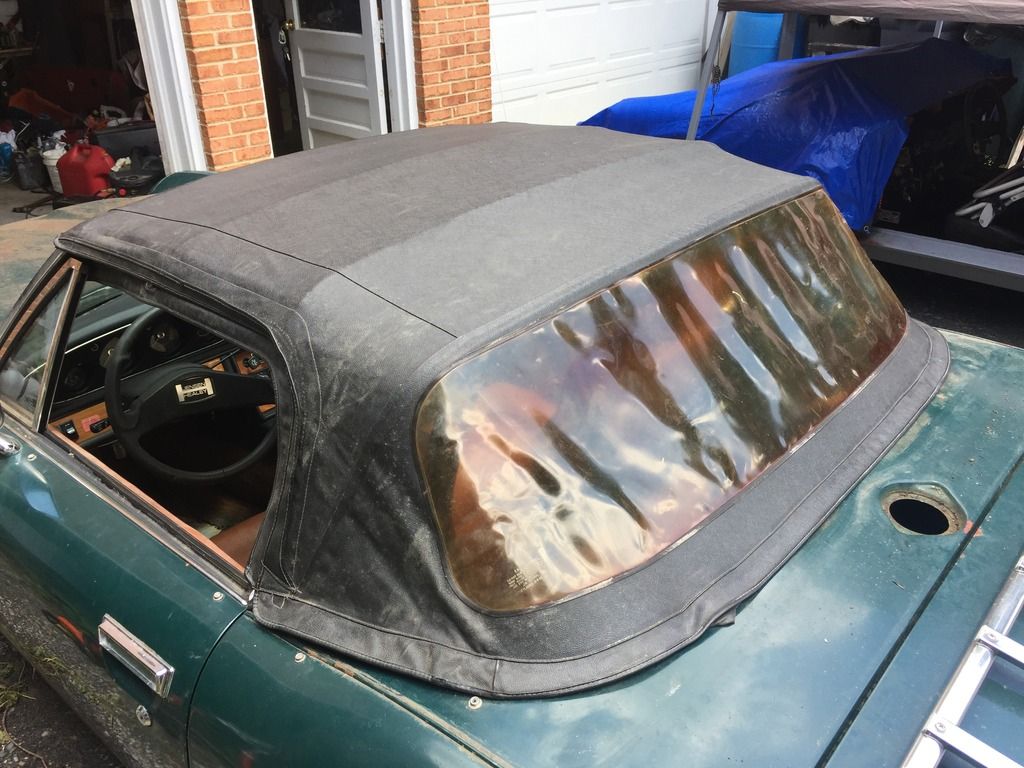 Along with that good news, there is the tonneau cover, leather front end bra, and leather tool bags in the trunk. SO, that's that. This car is above and beyond what I expected. Once I get some little things taken care of it'll be a driver. I'll most likely drive it a little this Summer and then pull the engine to do a major service/reseal on over the Winter. Thought about swapping the engine in from the red car, but I don't know either engine's service history and would like to keep the car #s matching. Did I mention I bought #19998 from the original owner? I did.
|
|||||||||||||
| ||||||||||||||
| Posted: 05-30-2017 05:48 pm |
|
15th Post |
|
Sander Member
|
SlamminJH, Congratulations on your latest purchase! You've entered the potato chip phase where you just can't stop with one! I've seen this many times before .... you start out with one JH and magically they start to multiply. Jensen Brother, you're not alone, Sander 2 Jensen GT's 1 '73 JH 1 '74 JH have parted out 2 JH's and 1 JGT I also have an ALFA (Always Looking For Another)
|
||||||||||||||
| |||||||||||||||
| Posted: 05-31-2017 03:15 pm |
|
16th Post |
|
SlamminJH Member
|
Haha, it's a good thing I have the red car. Green one has a misfire on cyl 3....turns out low compression. Had a obvious misfire when I got it running. Measured exhaust manis at each runner and #3 was noticeably cooler than the rest....so did a compression test... Cylinder 1-4: 120, 120, 60, 120 (+/-2psi) Didn't get to do a leak down...tester has different fittings than my compressor hose...will do one though to try and nail down a cause. So I'll check out the red car's engine and see if it's alright...if so I'll do a lil swapperoo. Last edited on 05-31-2017 03:18 pm by SlamminJH |
|||||||||||||
| ||||||||||||||
| Posted: 06-01-2017 02:33 pm |
|
17th Post |
|
Brett Gibson JH5 20497 Member
|
FYI your seats look great not torn and such, the biggest culprit that leads to split seams is the webbing under the bottom off the seat being worn and stretched, would be worth it to check, just a suggestion. Brett
|
||||||||||||||
| |||||||||||||||
| Posted: 06-01-2017 10:20 pm |
|
18th Post |
|
SlamminJH Member
|
I'll check that out, thanks! Taking them out to do floor repairs once I get it driving and can get it to the shop I work at. The engine in the red car (16984) has good compression on all four, 145-155psi. So I'll be transplanting that engine into 19998 for the time being and go through the original engine for 19998 and get it all 100%...maybe even get crazy with high comp pistons and the like....we'll see. Sad to see one go, but 16984 is just too far gone. It is kind of interesting to see how the cars, both of which sat unused about the same about of time, aged, 16984 being on the east coast (MD) and 19998 from the west (San Francisco).
|
|||||||||||||
| ||||||||||||||
| Posted: 06-05-2017 04:43 pm |
|
19th Post |
|
SlamminJH Member
|
Dropped the engine, trans, and front subframe all together over the weekend and power washed the engine bay. Only thing I forgot to unhook was the capillary tube for the oil pressure gauge. 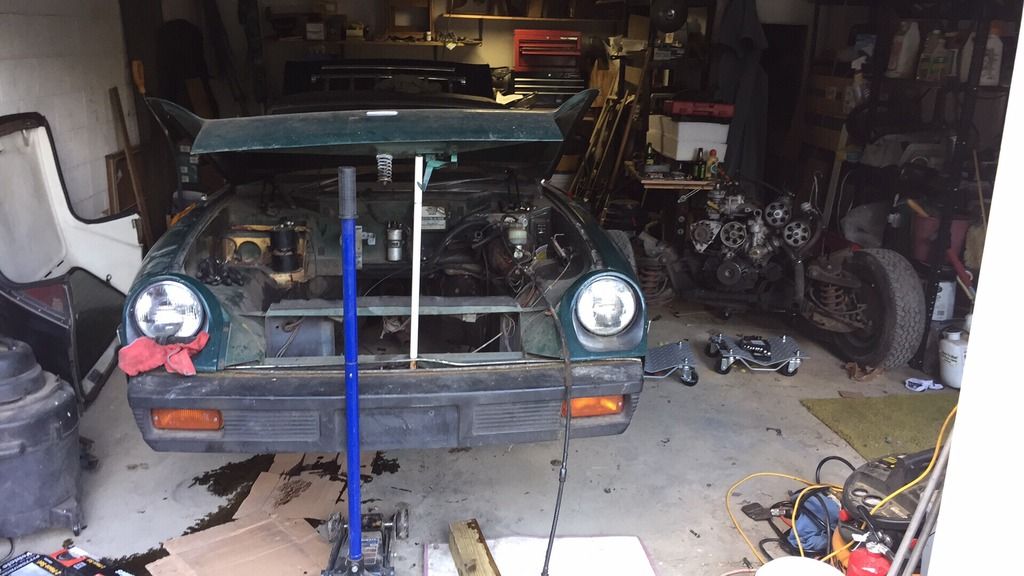 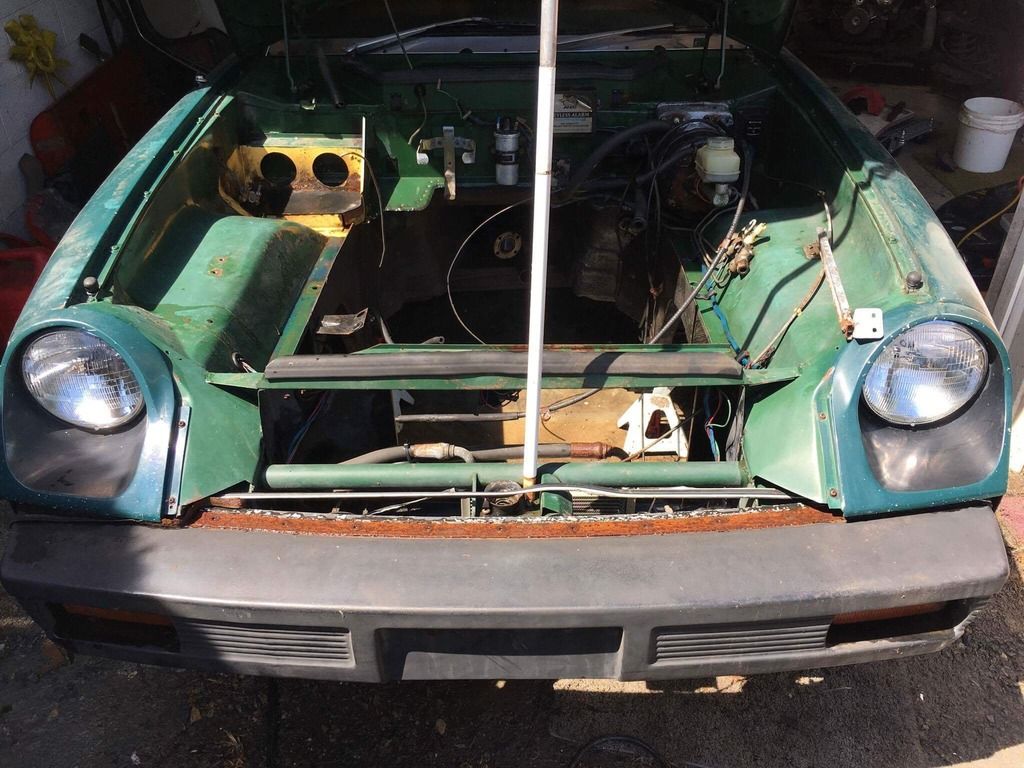 As you can see now, the car has been repainted a darker shade of green. According to the serial # it's supposed to be Oakland Green....I'm assuming that's the brighter green that the engine bay is. This green is also in the door jambs and other areas that are "hidden". Over the course of the week I'm going to remove the trans and pick the engine off the subframe, then power wash the subframe. This weekend the plan is to take a day and pop the red car's front out to do the same...and hopefully re-assemble the green car.
|
||||||||||||||
| |||||||||||||||
| Posted: 06-05-2017 04:47 pm |
|
20th Post |
|
SlamminJH Member
|
Also, what would be suggested for coating the inside of the trunk? That's the other thing to tackle. Totally clean, prime, and paint/seal it up. Thought about putting some small drains in the low areas as well to manage water so what does get in doesn't sit there.
|
|||||||||||||
| ||||||||||||||
| Current time is 09:58 pm | Page: 1 2   |
| > Jensen Healey & Jensen GT Tech > Projects > Project 16984. | Top |