| ||||
| ||||
| Moderated by: Greg Fletcher | Page:   1 2 1 2 |
|
|||||||||||||
| GT 30071 Rolling Restoration | Rating: 
|
| Author | Post |
|---|
| Posted: 04-26-2015 02:23 pm |
|
21st Post |
|
NigelK Member
|
I finally surrendered to the inevitable and had the Getrag 235/5 removed in favour of a Toyota W58 gearbox from a Lotus Excel. What made the decision for me in the end was the damage to the Getrag input shaft which LotusBits discovered - caused by an incorrectly installed clutch cover. I've had a bespoke leather gear knob made up with the Jensen GT badge, to replace the old one which has the wrong shift pattern it. LotusBits should be cracking on with the W58 installation next week - they'll need to convert it to cable clutch actuation, and fabricate a new gearbox mounting, gear lever extension and propshaft.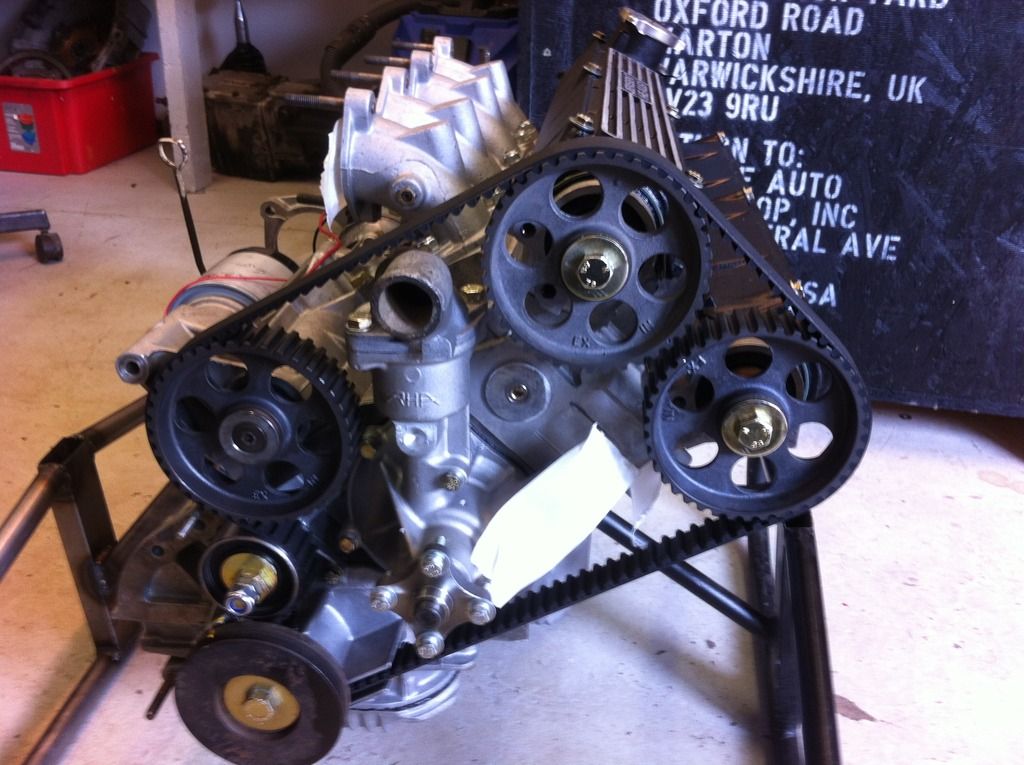 Last edited on 08-08-2015 06:34 pm by NigelK |
||||||||||||||
| |||||||||||||||
| Posted: 04-26-2015 02:24 pm |
|
22nd Post |
|
NigelK Member
|
I'm not yet sure whether the factory fit 3.45:1 cwp diff will be too tall for the W58 gearbox (which is generally taller geared than the Getrag) notwithstanding there'll be more engine torque post upgrade. Different people have different views here, and I reckon it depends whether one's priority is off-the-line performance or quieter motorway cruising. I won't be able to decide until I've got the GT back and lived with it for a while, but as an insurance policy I've just bought a low mileage 3.73:1 cwp axle off a Healey and am cleaning it up, and learning about half shafts and Lockheed drum brakes in the process. So I'll be able to swap out the axle if I want more acceleration off the line.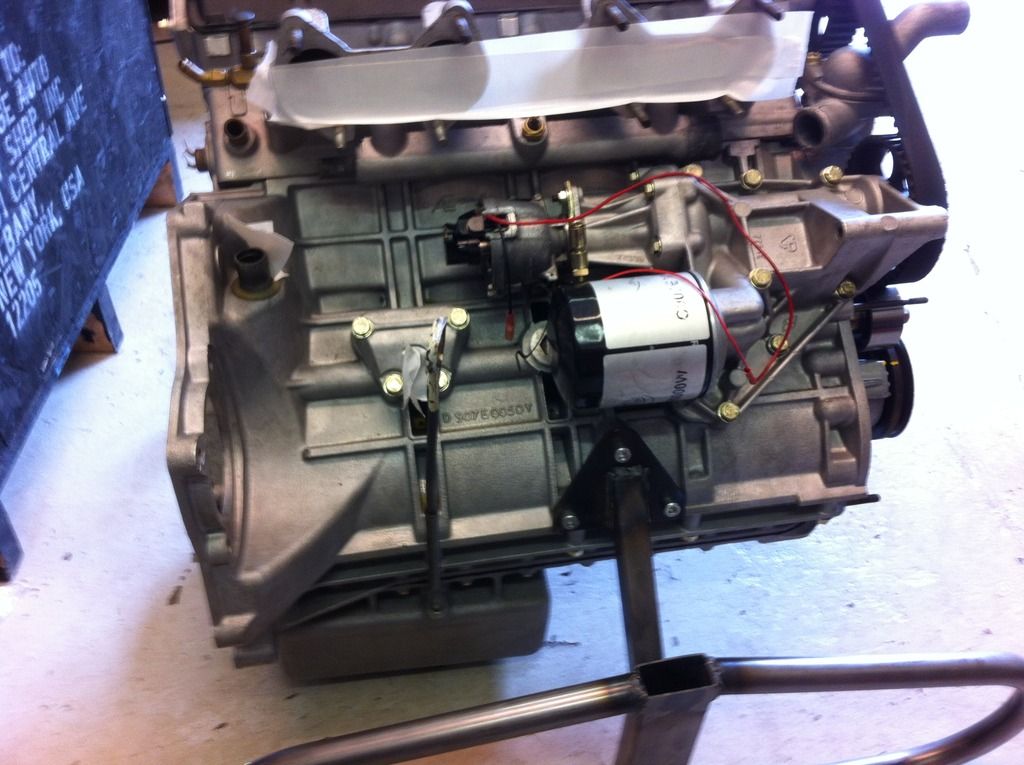 Last edited on 08-08-2015 06:34 pm by NigelK |
|||||||||||||
| ||||||||||||||
| Posted: 06-12-2015 06:25 pm |
|
23rd Post |
|
NigelK Member
|
Nearly finished! I visited LotusBits this morning, and they reckon they're about 2 weeks away from completing the engine rebuild, which has turned into an engine rebuild / gearbox upgrade / major chassis repair job. The rebuilt 907/912HC hybrid is back in the car, the gearbox is installed with the custom gearbox mounting and shifter, the o/s rearmost sub-frame mounting in the chassis rail has been repaired and all the sub-frame / chassis bushings replaced so the car doesn't lean to one side anymore, and the big bore exhaust is trial-fitted.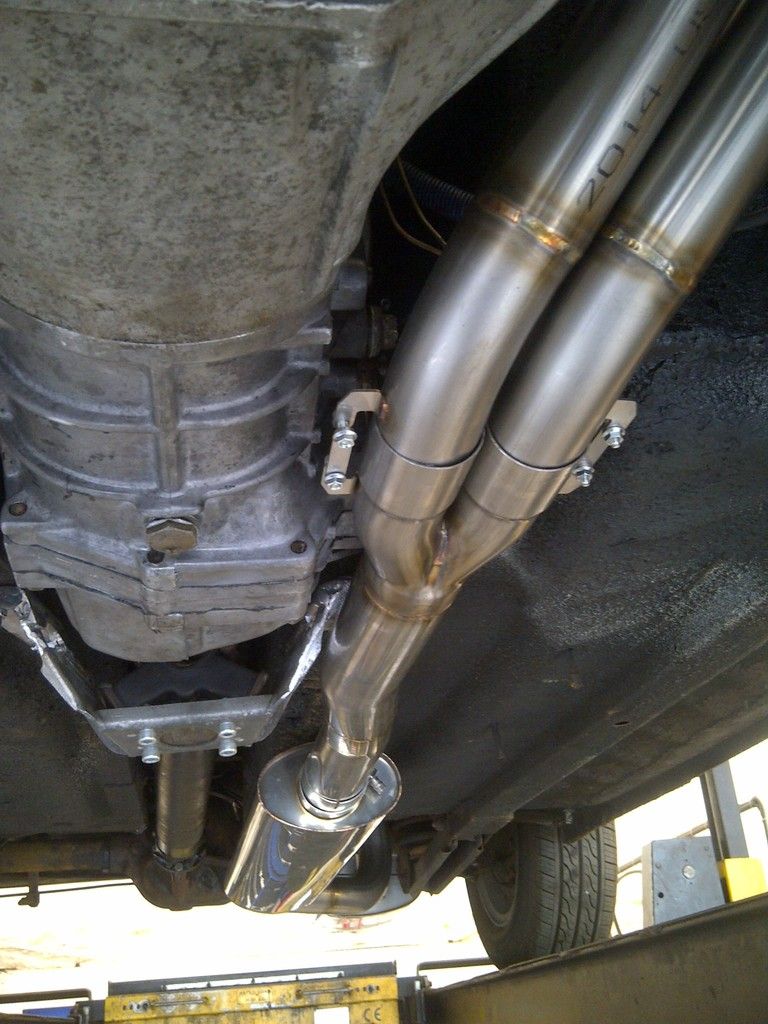 Last edited on 08-08-2015 06:33 pm by NigelK |
||||||||||||||
| |||||||||||||||
| Posted: 06-12-2015 06:26 pm |
|
24th Post |
|
NigelK Member
|
Mike Taylor and his team have also had to replace the oil cooler which was shot and would have distributed metal particles around my newly rebuilt engine, and discovered that the original engine had 3x Lotus 9.5:1 CR pistons, and 1x JH 8.0:1 piston fitted. I was wondering why the compression readings from one cylinder were a little low. They've also replaced the engine mountings, one of which was held together with silicone sealant. This, together with the incorrectly attached clutch plate which had destroyed the spigot bearing and damaged the gearbox input shaft, which was discovered when the engine and gearbox were first pulled at the start of the job, makes me relieved I decided to get all these major works done before putting some serious miles on the car.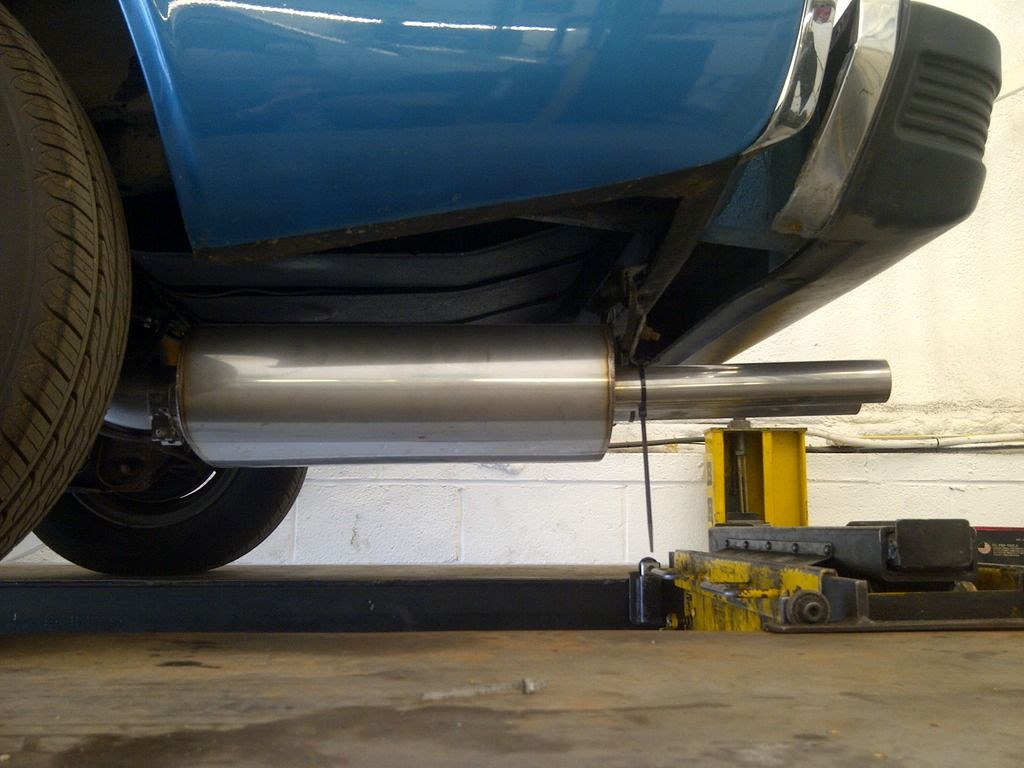 Last edited on 08-08-2015 06:32 pm by NigelK |
|||||||||||||
| ||||||||||||||
| Posted: 06-12-2015 06:27 pm |
|
25th Post |
|
NigelK Member
|
I am particularly pleased with the new exhaust - it is custom made by LotusBits for the Lotus Excel (http://lotusbits.blogspot.co.uk/2010/11 ... steel.html) but they've also fabricated a version for the Jensen Healey / GT with two boxes (together longer than the original three boxes, so hopefully quieter), which looks pretty much identical from the rear of the car, but looks the absolute bee's knees from underneath, as you can see from the pictures...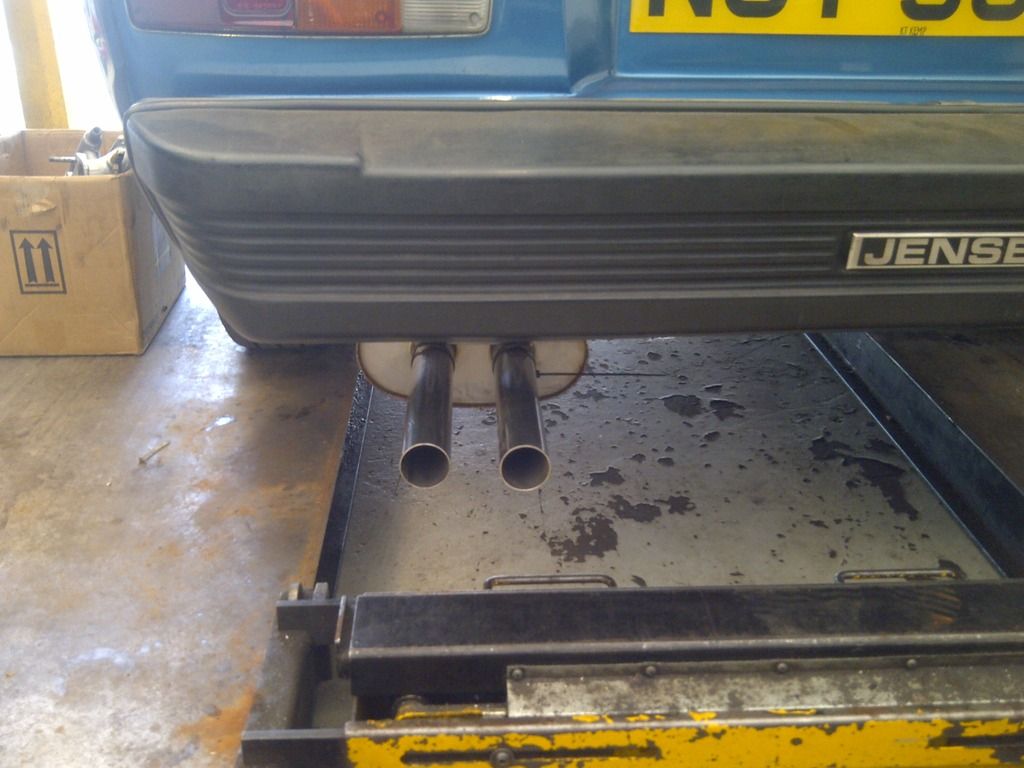 Last edited on 08-08-2015 06:31 pm by NigelK |
||||||||||||||
| |||||||||||||||
| Posted: 06-27-2015 11:36 pm |
|
26th Post |
|
Michael Fishelson Member
|
Looks lovely, I was thinking of an internal antenna for my car as well. Does yours work well and if so what is the make of the unit? Thanks for your help, Michael
|
|||||||||||||
| ||||||||||||||
| Posted: 06-28-2015 12:41 am |
|
27th Post |
|
NigelK Member
|
Hi Michael I used one of these - http://www.retrosound.com/product-p/1950-54-hpa1.htm Despite the manufacturer claims that it works "almost anywhere", it did not provide good radio reception when I installed it under the dash. Possibly too much EM interference from the old electrical components under the bonnet. It worked much better when I reinstalled it on the rear inner wing behind the vinyl trim, and ran the cable along the side of the sill under the foot well carpet. The reception is still not 100%, but it's good enough (for what is quite a noisy car), and they are phasing out FM radio here in the UK anyway, so as from next year it'll be MP3 only... Hope this helps. Best wishes, Nigel
|
||||||||||||||
| |||||||||||||||
| Posted: 07-28-2018 02:40 pm |
|
28th Post |
|
NigelK Member
|
Dear All I've just got my GT back from Lotusbits with the latest (and definitely final) engine upgrades. Upgrades as follows - i) gas-flowed CNC ported head with new valve guides and valve seats cut to fit Lotusbits oversized waisted valves, ii) Kent L14 cams inlet and exhaust (similar to Lotus 104 cams), iii) skimmed and matched inlet manifold, iv) Lotus spec 10 ignition system (Lucas 45DM4 distributor / AB14 remote amplifer and coil) replaced with mapped ignition system (crankshaft mounted trigger, DTA S40 Pro ECU with throttle position and temperature sensors, plus coil pack). Troy at Northampton Motorsport, with help from Dave from Lotusbits, then set the car up on the rolling road with tweaks to the ignition and some leaner main jets. The chart shows engine hp, engine torque and lambda before (dotted lines) and after (solid lines) the upgrades. Peak hp has increased substantially from 183.6hp at 6,850rpm to 204.8hp at 7,050 rpm. Peak torque has increased marginally from 167.1lb-ft at 5,000rpm to 171.5lb-ft between 4,900-5,700rpm. Both power and torque are generally lower below 4,500rpm, as would be expected with more airflow in the head and different cams. There is still a significant power and torque dip on the dyno plot, albeit at 200-300rpm higher than before. The lambda figures would suggest this could be an over-fuelling issue, certainly the dip was more pronounced before Troy fitted leaner main jets. There is probably little more I can do to fix this dip, short of going full EFI which I do not want to do. And in any case, I do not notice the dip in everyday driving. In fact there is noticeably increased tractability at lower revs with the mapped ignition. There is a pronounced boost in power and torque at 3,000rpm, although nothing too raucous. However the car now really takes off at 5,000rpm making overtaking a breeze with the large bore exhaust emanating a lovely 4-cylinder snarl. Lots of fun! Best wishes, Nigel Attachment: Dyno results 250718a.jpg (Downloaded 123 times)
|
|||||||||||||
| ||||||||||||||
| Posted: 12-02-2018 08:32 am |
|
29th Post |
|
jpalmer200 Member
|
Hi Nigel I've just started a GT restoration. Are you able to advise what you did about the seats in the end? Jim P
|
||||||||||||||
| |||||||||||||||
| Posted: 12-02-2018 08:38 am |
|
30th Post |
|
NigelK Member
|
Hi Jim Yes I managed to get replacement corduroy fabric from SMS auto fabrics in Oregon. Rejen (just up the road from you near Winchester) used the fabric to retrim and replaced the foam too. Am very happy with the results. Best wishes, Nigel
|
|||||||||||||
| ||||||||||||||
| Posted: 12-02-2018 08:41 am |
|
31st Post |
|
NigelK Member
|
http://www.jensenhealey.com/forums/view_topic.php?id=2369&forum_id=11
|
||||||||||||||
| |||||||||||||||
| Posted: 12-02-2018 12:44 pm |
|
32nd Post |
|
jpalmer200 Member
|
Thanks Nigel - missed the follow on bit - thanks for the pointer. I’m just at the enthusiastic dismantling stage, so any encouragement that there’s an end in sight is really good news!! Jim P
|
|||||||||||||
| ||||||||||||||
| Posted: 12-10-2018 08:01 pm |
|
33rd Post |
|
jpalmer200 Member
|
Hi Nigel How did you split the hatchback frame to replace the seal? Jim P
|
||||||||||||||
| |||||||||||||||
| Posted: 12-10-2018 09:52 pm |
|
34th Post |
|
NigelK Member
|
Hi Jim You mean the seal that runs around the edge of the hatch? That’s just two pieces of T-section piece of rubber seal, one which runs along the bottom of the hatch and another longer piece which runs around the rest of the hatch, with mitred joins. The seal slides into a channel in the hatch frame. You cut small notches in it to make it fit better around the curved corners of the hatch. The original seal is NLA but I found a workable replacement which seals better. I’ll look up the reference number tomorrow when I have access to my PC. Best wishes, Nigel Last edited on 12-10-2018 09:54 pm by NigelK |
|||||||||||||
| ||||||||||||||
| Posted: 12-11-2018 09:32 am |
|
35th Post |
|
NigelK Member
|
Hi Jim Here is a cross-section showing how I made the hatch on my GT watertight. I used two pieces of a Woolies seal (reference R679) around the hatch itself, plus a new hatch aperture seal from Robeys (Jensen part 98391) glued into place and with additional black silicone sealant applied around the outer edge. Hope this helps. Best wishes, Nigel Attachment: Tailgate cross section.jpg (Downloaded 66 times)
|
||||||||||||||
| |||||||||||||||
| Current time is 03:49 pm | Page:   1 2 1 2 |
| > Jensen Healey & Jensen GT Tech > Projects > GT 30071 Rolling Restoration | Top |